Adaptive Positioning Bench — V2
Build with care. Share with love.
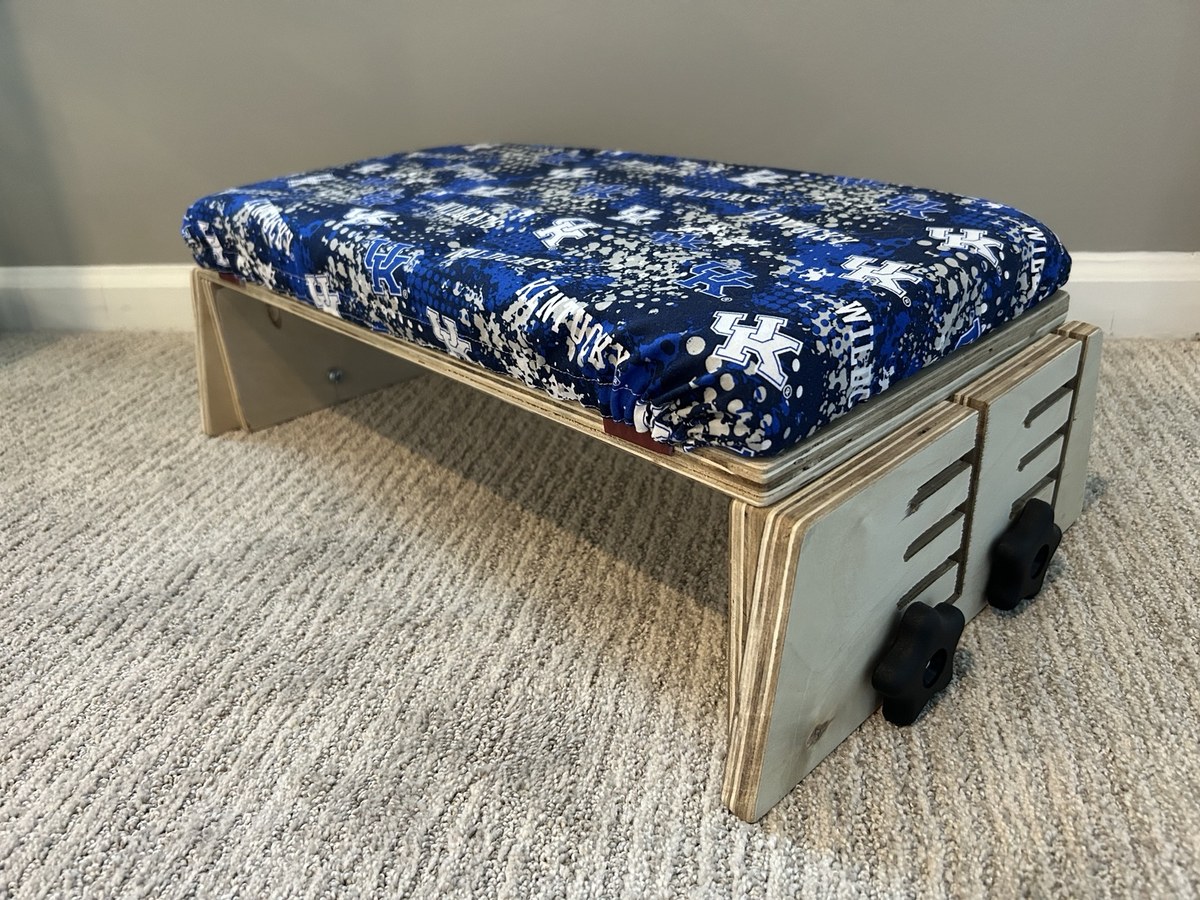
A small plywood bench with adjustable incline for supported play and positioning activities, using routed slot-channel adjustment. Includes the full build plan, real product photos, and a downloadable PDF for printing or shop use. Looking for an easier build? See V1, the drill-hole version.
About this build
V2 upgrades the bench's height adjustment from V1's drilled bolt holes to routed slot channels, so the incline can be set to a continuous range of positions instead of a few fixed rows. It takes a router (or a careful jigsaw and file), a bit more shop time, and slightly more hardware budget than V1 — in exchange for smoother, more precise adjustment.
⚠️ Important safety note
This project is a DIY adaptive equipment plan, not a registered or certified medical device, and it is not intended to diagnose, treat, or replace a prescribed course of therapy. Use only with direct adult supervision and confirm the child's positioning needs with a PT, OT, or qualified clinician before use.
- This is a DIY adaptive equipment plan, not a registered or certified medical device.
- Use only with direct adult supervision.
- Confirm fit, angle, posture, and use case with a PT, OT, or qualified clinician.
- Do not use if the child can tip, climb unsafely, or become trapped under/around the bench.
- Inspect knobs, bolts, plywood layers, and finish before every use.
📸 See the finished bench
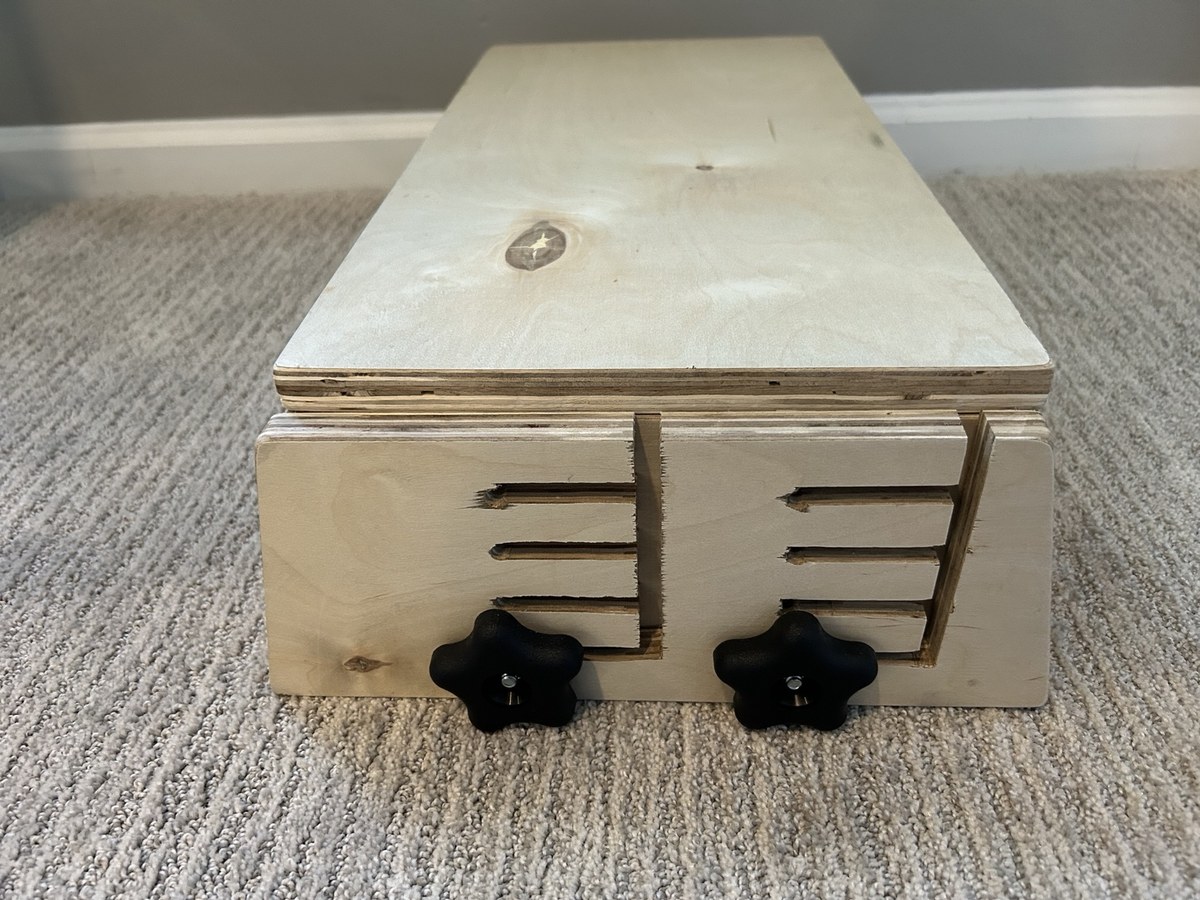
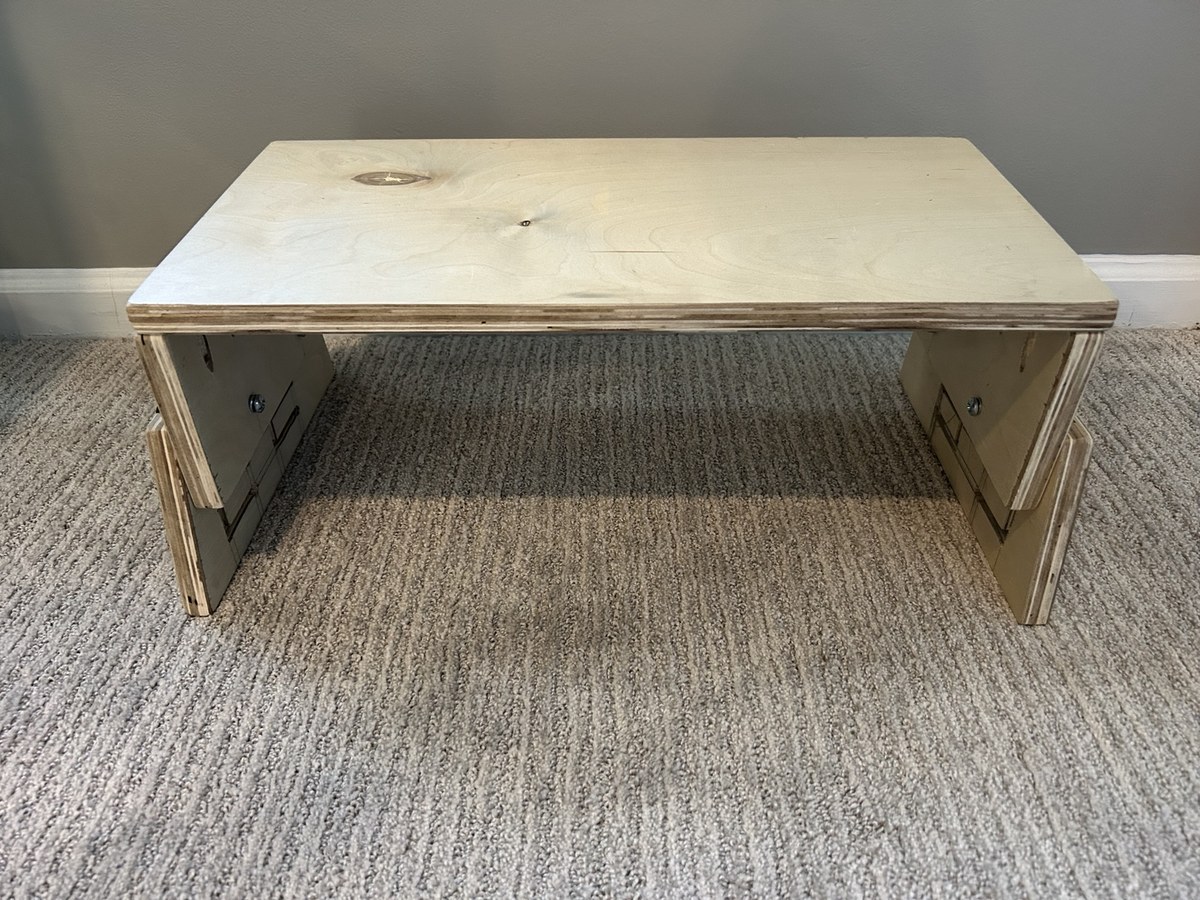
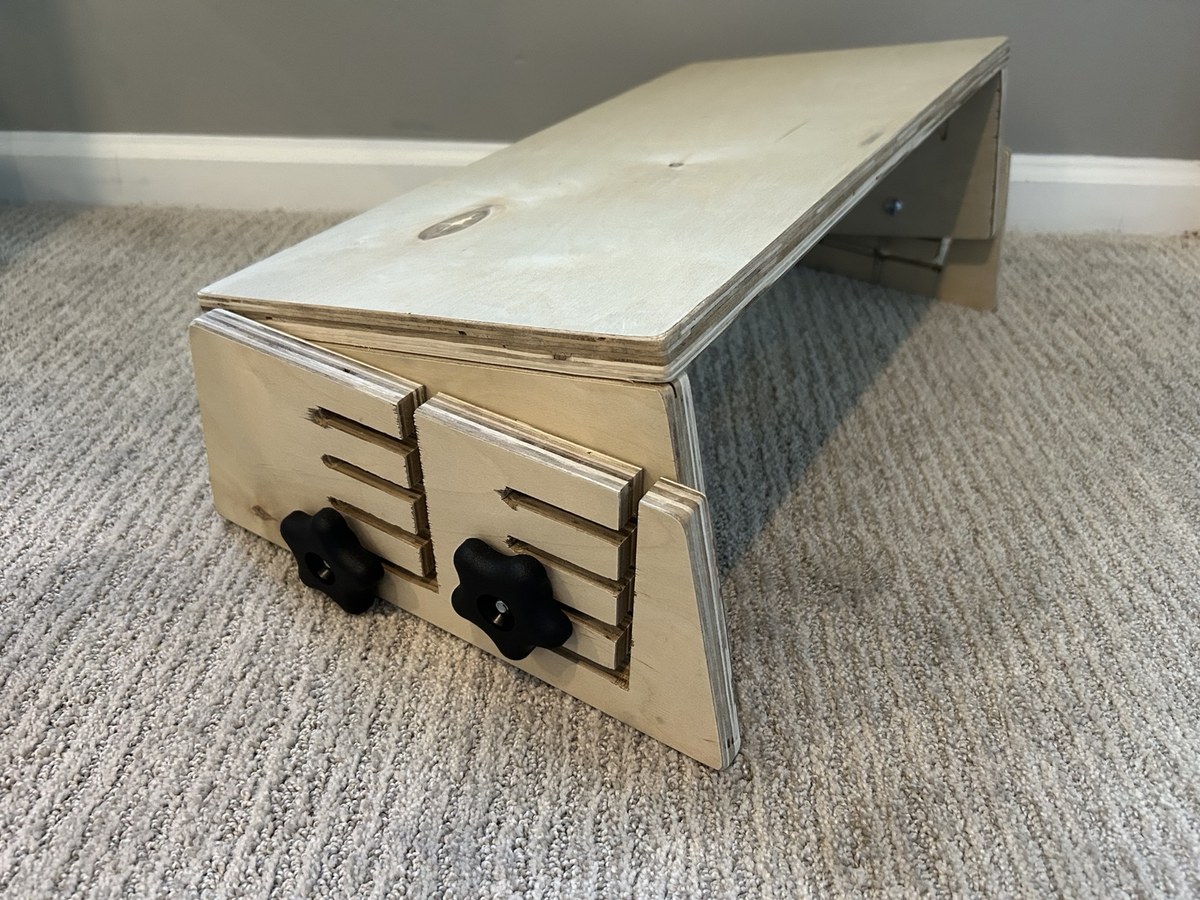
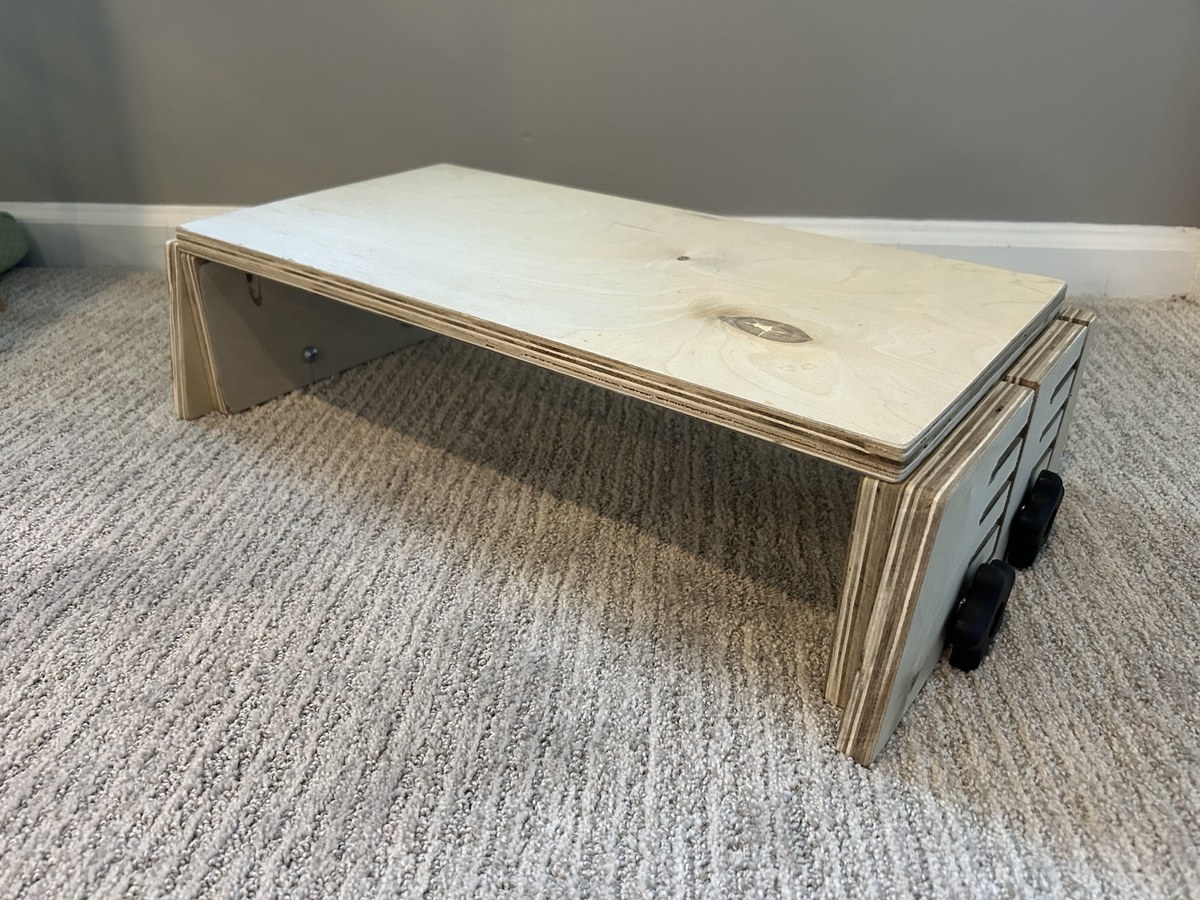
Photos of the actual prototype, built and finished from this plan.
Overview
This adaptive positioning bench is built from 3/4" birch plywood with slotted side plates and knob hardware so the platform can be set flat or at a gentle incline.
Project details
📏 Finished size: Approx. 24" L x 10" W x 7" H, with multiple incline positions
🛠️ Difficulty: Intermediate woodworking
💰 Estimated cost: Approx. $35–$75 depending on hardware and cushion materials
⏱️ Estimated time: One weekend, plus finish drying time
🧰 Materials
| Item | Notes |
|---|---|
| 3/4" birch plywood | One 2' x 4' panel is typically enough for the bench body |
| 1/4"-20 bolts | Four bolts, length matched to your plywood stack and knob depth |
| 1/4"-20 star knobs | Four knobs make the incline easy to loosen and re-tighten |
| 1/4" washers | Use under knobs and bolt heads where helpful |
| Wood glue | For laminated/stacked parts and support blocks |
| 1-1/4" pocket screws or wood screws | For attaching support legs and blocking |
| Sandpaper | 120, 180, and 220 grit recommended |
| Water-based polyurethane or child-safe finish | Seal all faces and exposed plywood edges |
| Optional cushion | High-density foam, fabric/vinyl cover, staples or hook-and-loop attachment |
🔧 Tools
- Circular saw or track saw
- Jigsaw or router for templates and slots
- Drill/driver
- 1/4" drill bit
- Pocket-hole jig or countersink bit
- Clamps
- Random-orbit sander
- Measuring tape, square, pencil
- Router with roundover bit recommended
A router makes cleaner slots and roundovers, but a jigsaw and careful sanding can work for a basic prototype.
📐 Cut list
| Part | Qty | Size | Notes |
|---|---|---|---|
| Top platform | 1 | 24" x 10" | Round over all corners and edges |
| Inner support legs | 2 | 10" W x 7" H | Mount perpendicular under top, near each end |
| Outer adjustment plates | 2 | 7" H trapezoid, approx. 10" top / 14" bottom | Use the slot pattern/template for adjustment |
| Slot guide/locking blocks | 4 | Approx. 1-1/4" x 5-1/2" | Size to cover slots without interfering with knob travel |
| Optional cushion base | 1 | 24" x 10" foam | Attach with hook-and-loop so it can be removed for cleaning |
Slot pattern guidance
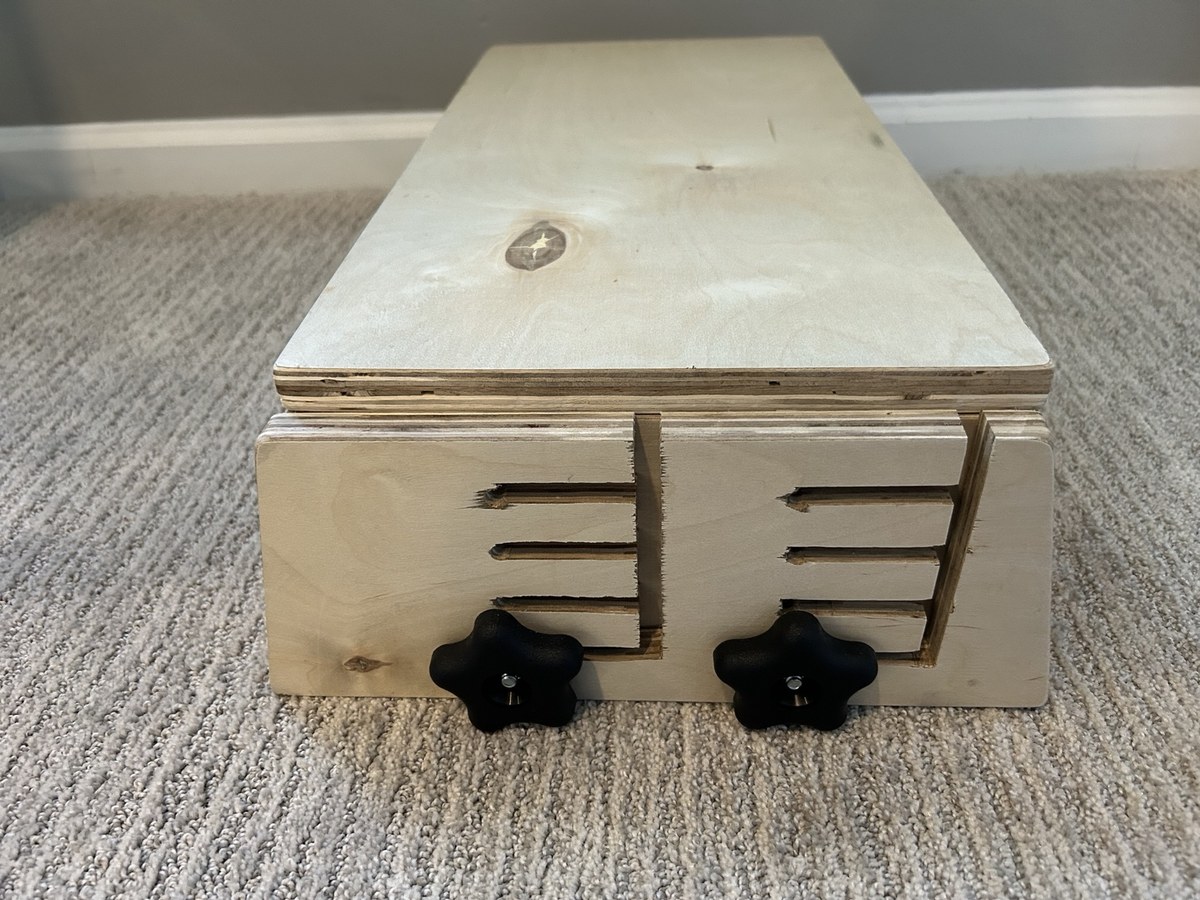
The outer adjustment plates use one vertical channel and several horizontal slots. Drill clean rounded ends first, then connect the openings. The bolts should slide into each position without binding, but the knobs should lock the bench firmly when tightened.
🖨️ Optional: 3D-printed router jig for the outer channel
If you're cutting the outer adjustment plates with a router, there's a free, community-made router template for the outer leg channel: sized for a 3/4" outer-diameter router guide bushing, 4" tall. It's a handy way to get a clean, repeatable channel without laying it out by hand.
Not yet used on the prototype pictured above — a rebuild using this jig is planned, with updated photos to follow.
View the router jig on MakerWorld🔨 Assembly steps
Confirm the size and use case
This bench is sized as a small positioning bench. Before building, confirm the child’s current positioning needs with a PT or OT and decide whether you want a bare wood top, removable cushion, or washable cover.
Cut the top platform
Cut the 24" x 10" top from 3/4" birch plywood. Ease every edge with sandpaper or a roundover bit. The top should feel smooth with no sharp corners.
Cut the inner support legs
Cut two 10" x 7" inner legs. These sit under the platform and carry the bench load. Drill clearance holes for the adjustment bolts so the bolt path is square and repeatable.
Cut the outer adjustment plates
Cut two outer trapezoid plates using the template dimensions. Lay out the vertical channel and horizontal adjustment slots before cutting. Keep both plates stacked or clamped together while marking so the slots line up.
Create the adjustment slots
Drill relief holes at the slot ends, then connect them with a jigsaw or router. Clean the slots with a file or sandpaper so the bolts slide freely without catching.
Dry fit before glue or finish
Assemble the top, inner legs, outer plates, bolts, washers, and knobs without finish. Test every incline position. The top should lock firmly without side-to-side wobble.
Attach support legs and blocking
Attach the inner support legs square to the underside of the platform. Use glue and screws, pocket holes, or countersunk fasteners. Keep fasteners flush or hidden so nothing scratches the child or floor.
Sand and round over
Sand all exposed faces and plywood edges through 180 or 220 grit. Pay special attention to the adjustment slots, lower corners, and any place a hand may touch.
Finish safely
Apply a water-based polyurethane or child-safe finish to all sides, edges, and inside slot surfaces. Let it cure fully based on the product label before use.
Add the optional cushion
If padding is needed, add a removable cushion made from high-density foam and washable fabric or vinyl. Avoid permanent upholstery until you know the height and angle work well.
Final safety check
Before each use, confirm all knobs are tight, the bench does not rock, the top is not cracked, and the child is supervised. Stop using it if any hardware loosens or wood shows damage.
✅ Final inspection checklist
- All edges and corners are rounded smooth.
- Adjustment slots are clean and bolts slide freely.
- Knobs tighten securely in every incline position.
- Bench does not wobble or rack side-to-side.
- Finish has cured fully before use.
- Cushion is secure but removable for cleaning.
- Adult supervision and clinical fit check are in place.
Build it yourself
Use the plan on this page or print the PDF for the shop. Confirm measurements before cutting and test fit before finishing.
Ask for help
If you do not have the tools or comfort level, ask a local maker, woodworker, or volunteer to help build from the PDF.
Share improvements
Send photos, notes, and safety observations back to Built For Them so future families get a better plan.

Every Built For Them plan is reviewed and shared by the same small team behind this badge.