Adaptive Positioning Bench — V1
Build with care. Share with love.
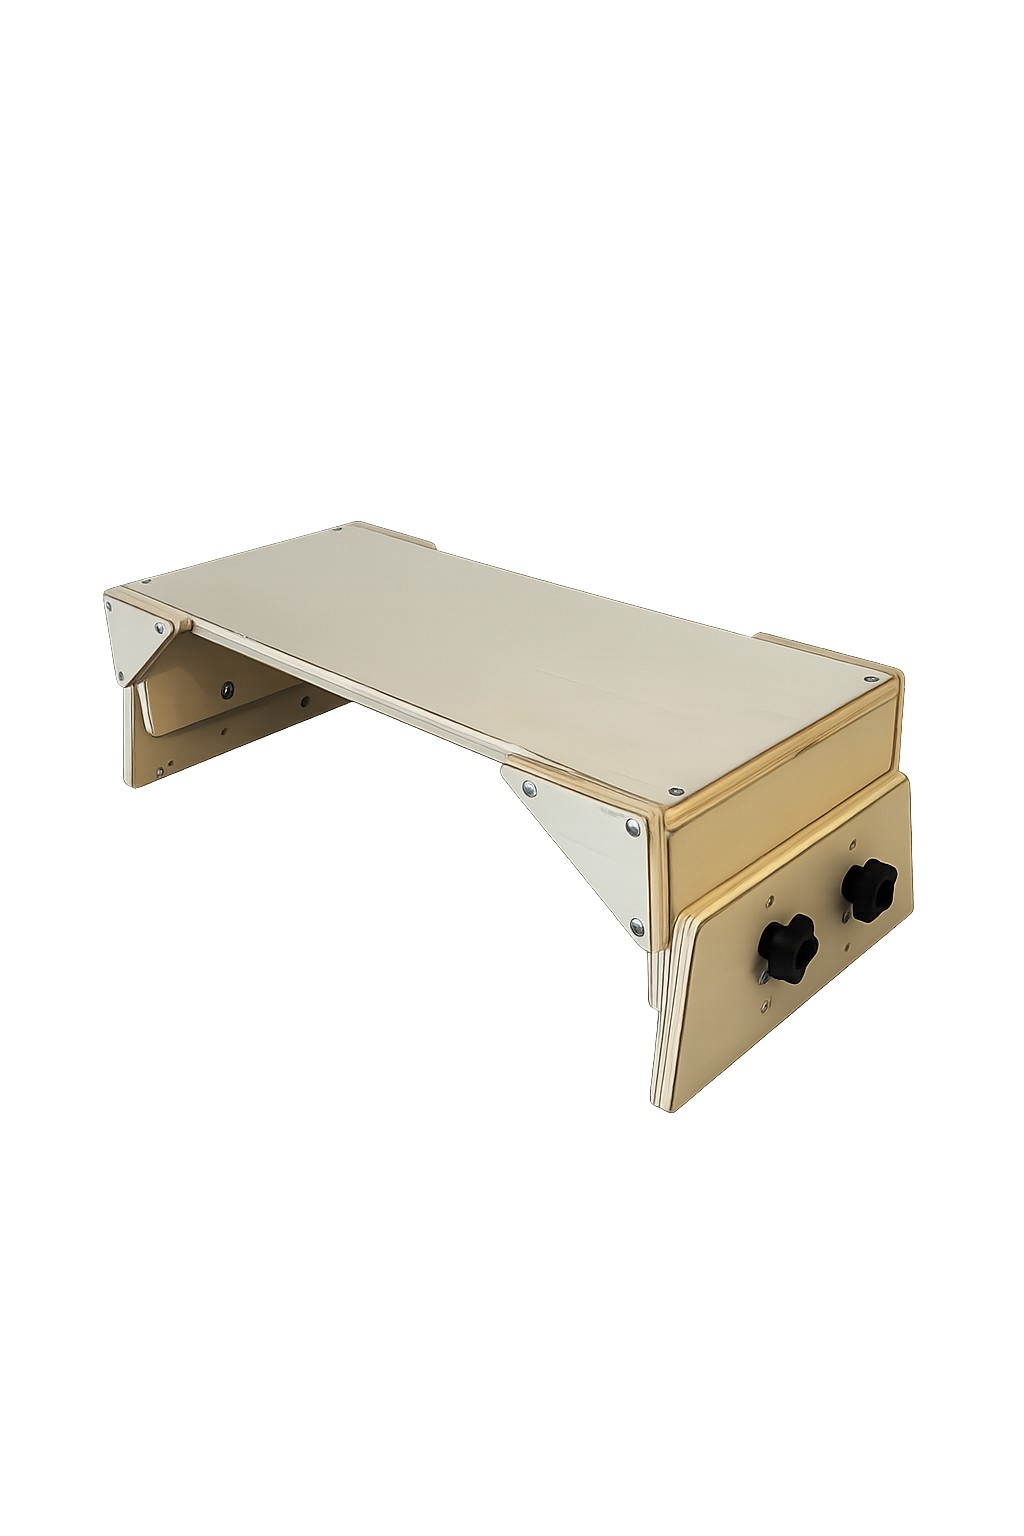
A simpler, parent-friendly version of our adaptive positioning bench. Drilled adjustment holes replace routed slot channels, so it can be built with a circular saw or jigsaw, a drill, sandpaper, and common hardware — no router required. Want finer incline adjustment? See V2, the routed-slot version.
About this build
V1 is the starting version of this bench: drilled adjustment holes stand in for V2's routed slot channels, so it can be built with tools most parents already own — a circular saw or jigsaw, a drill, sandpaper, and common hardware. Adjustment is limited to a few fixed hole rows instead of a continuous slot, which keeps the build simple and beginner-friendly.
⚠️ Important safety note
This is a DIY woodworking plan, not medical advice or a registered/certified medical device, and it is not intended to diagnose, treat, or replace a prescribed course of therapy. Ask your child's therapist what height and angle are appropriate before use.
- Use only with direct adult supervision.
- Confirm height, tilt, and posture with a PT, OT, or qualified clinician before use.
- Designed for level positions or a gentle one-row tilt only — never force a bigger adjustment.
- Inspect all four knobs, bolts, and edges before every session.
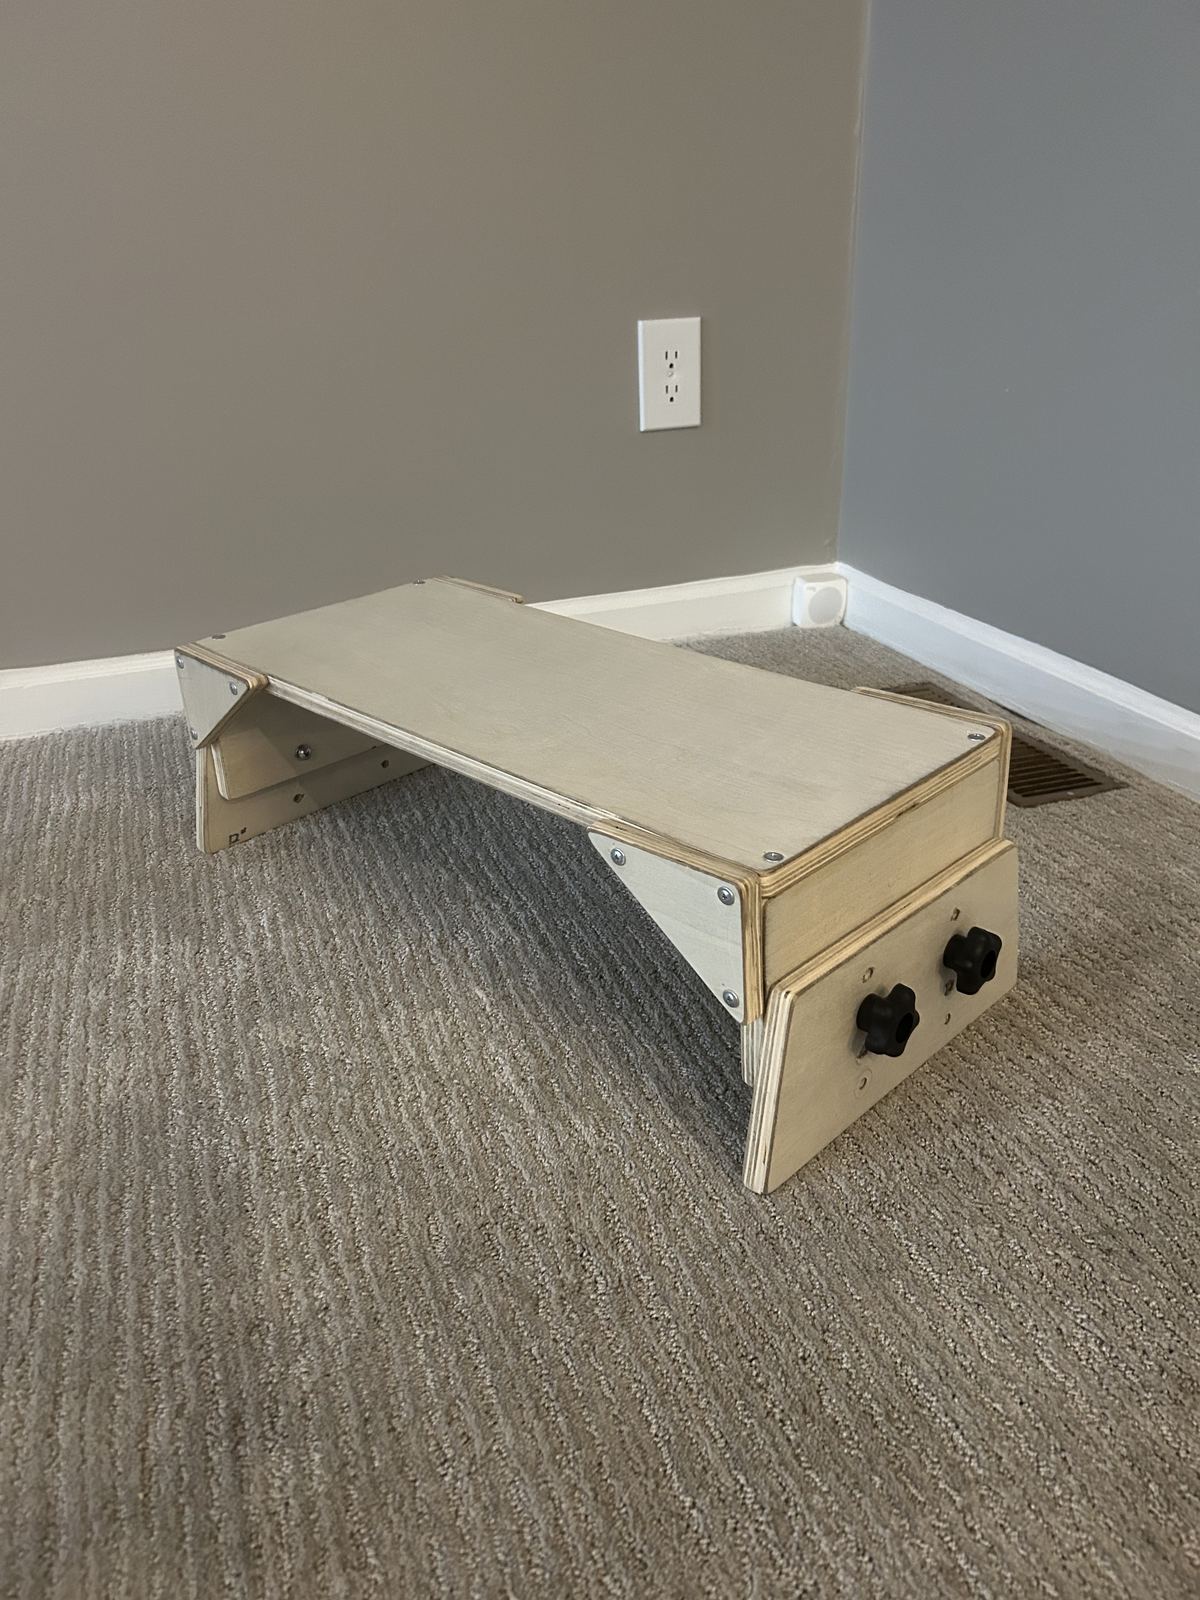
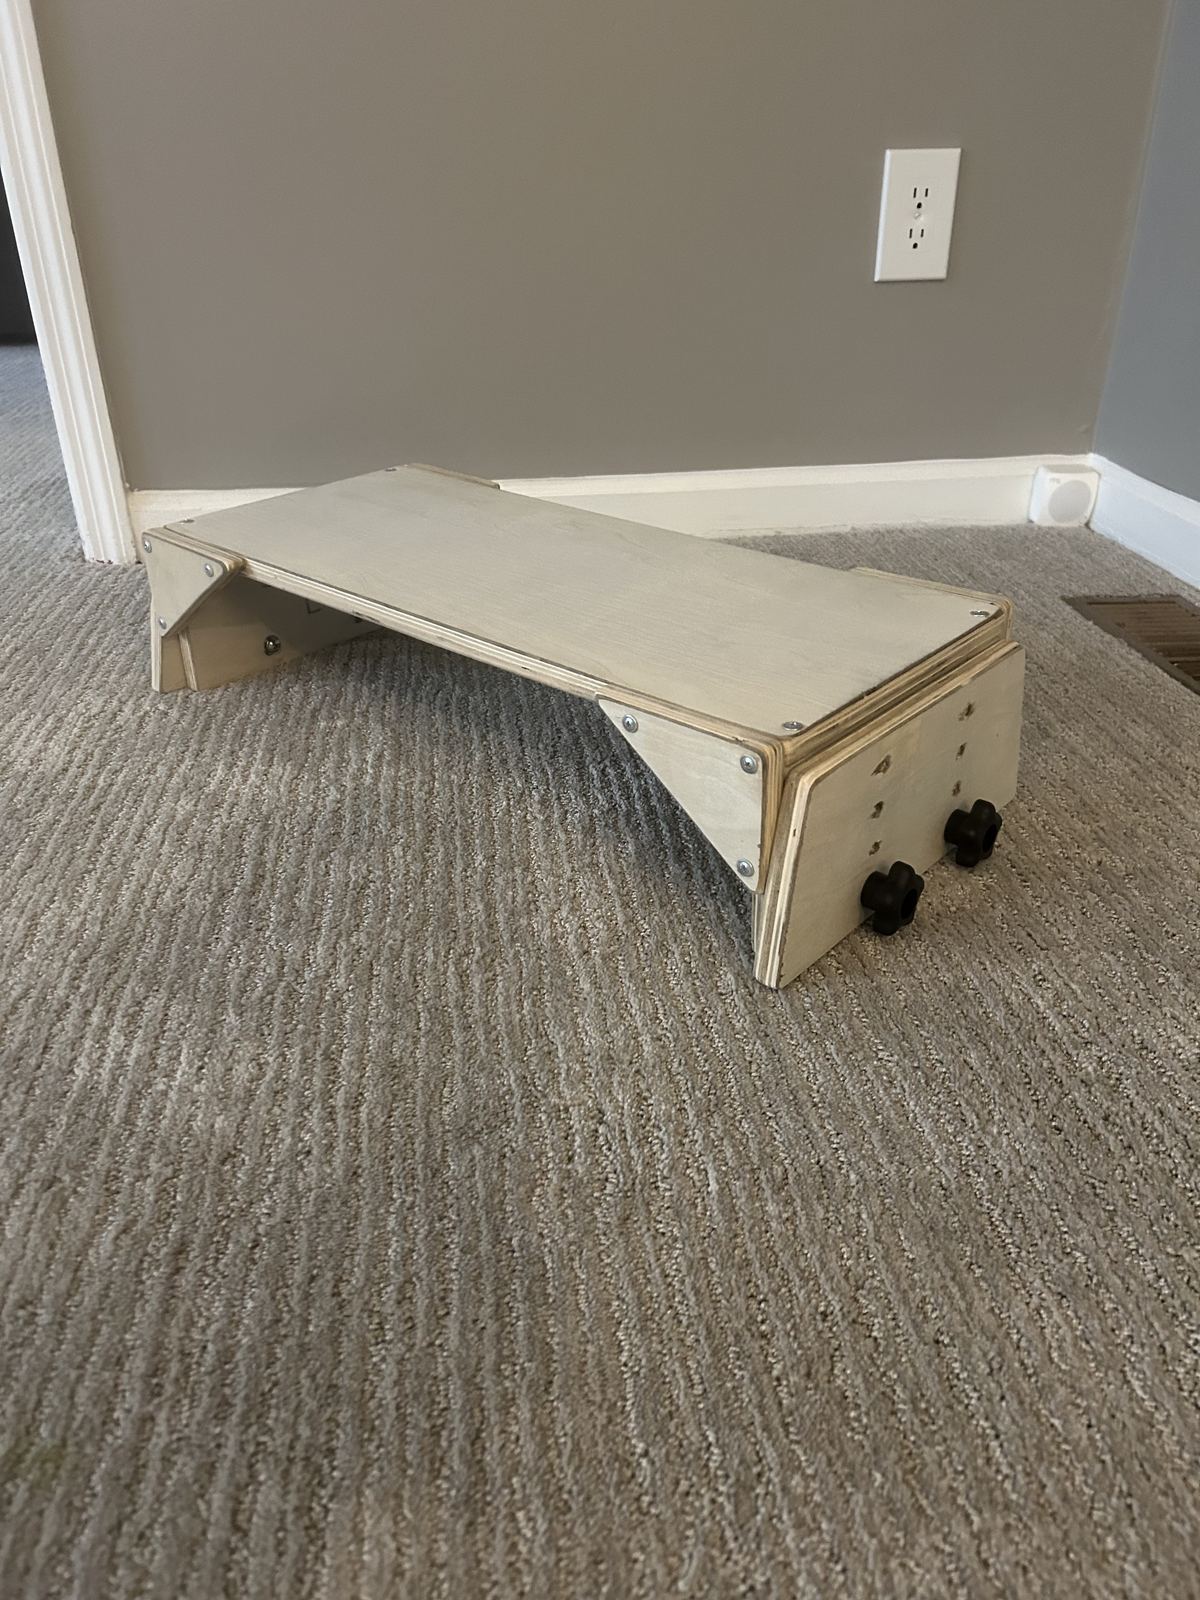
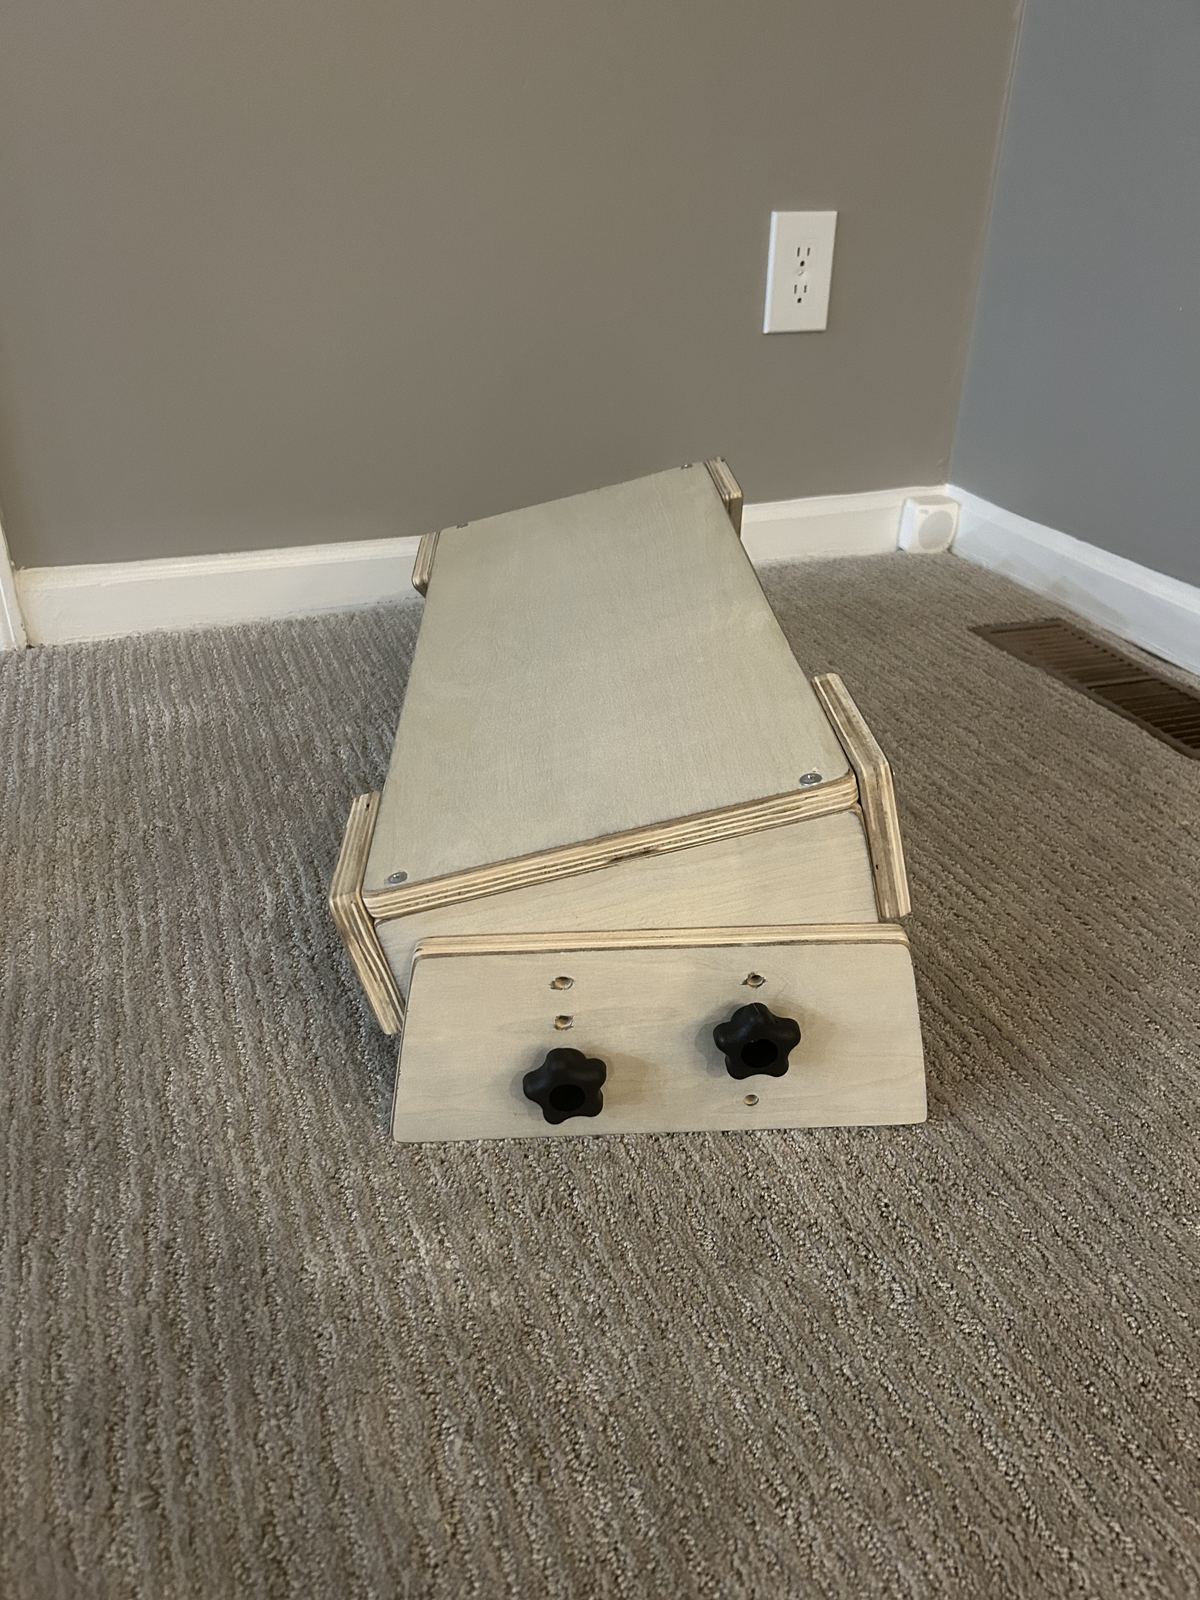
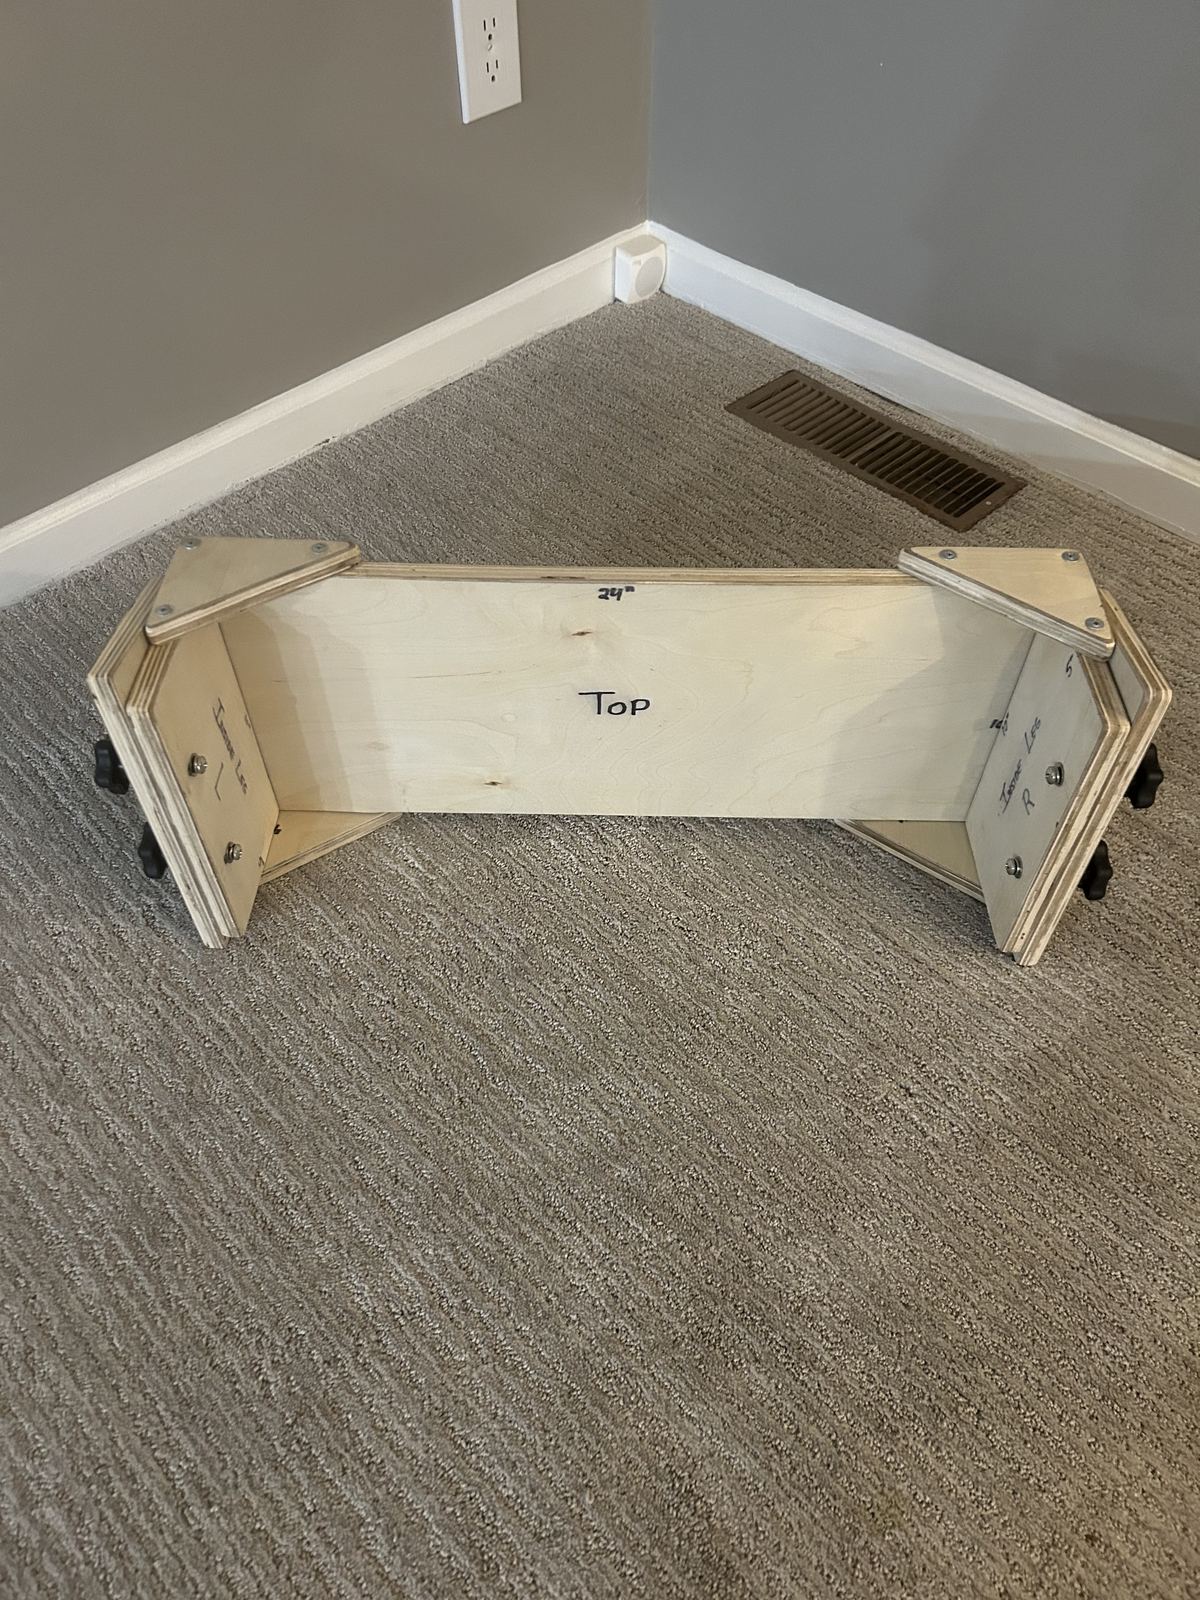
📸 See the finished V1 bench
Photos of the actual prototype, built and finished from this plan.
Overview
This bench supports floor-sitting work and supported positioning activities for children who benefit from a firm, adjustable-height surface. The outside legs slide onto captured bolts in the inside legs — matching hole rows give a level bench, and adjacent rows give a gentle tilt.
Project details
📏 Finished size: Approx. 24" L x 10" W, 5" base leg height, with 4 drilled height positions
🛠️ Difficulty: Beginner-friendly woodworking
💰 Estimated cost: Approx. $30–$60 depending on hardware and finish
⏱️ Estimated time: An afternoon, plus finish drying time
🧰 Materials
| Item | Notes |
|---|---|
| 3/4" birch plywood | One 24" x 24" sheet is enough for the whole bench |
| 1/4"-20 bolts | Four bolts, 2-1/2" to 3" long |
| 1/4"-20 star knobs | Four knobs for hand-tight adjustment |
| 1/4" flat washers | Eight washers |
| 1/4" lock nuts | Four nylon lock nuts, used to capture the bolts in the inside legs |
| 1" to 1-1/4" wood screws or brad nails | Sixteen, for legs and triangle braces |
| Sandpaper | 80, 120, and 220 grit |
| Water-based polyurethane, paint, or clear coat | Seal all faces and exposed plywood edges |
| Optional rubber feet or non-slip pads | For added floor grip |
🔧 Tools
- Circular saw, jigsaw, miter saw, or handsaw
- Drill/driver + 5/16" drill bit
- Clamps, square, tape measure, pencil
- Sander or sanding block
No router and no slot channels — every adjustment hole is drilled, which is what makes this version easier for a first-time builder.
📐 Cut list
| Part | Qty | Size | Notes |
|---|---|---|---|
| Top | 1 | 24" x 10" | Main bench surface |
| Inside leg | 2 | 10" x 5" | Fixed under the top; contains the captured bolts |
| Outside leg | 2 | 12" base x 5" tall, tapered to 10" top | Adjustable outer support; drill two columns of holes |
| Triangle brace | 4 | 5" x 4" right triangle | Installed on the outside of each top/inside-leg joint |
All parts nest onto one 24" x 24" sheet: cut the top first, rip two 5" strips for the legs, then a 4" strip for the triangle braces. Outside legs are symmetrical trapezoids — stack both blanks and cut them together so they match.
Drill-hole adjustment layout
Each inside leg gets two fixed bolt holes near the bottom — once bolted through with washers and lock nuts, these act as semi-permanent studs. Each outside leg gets a front and rear column of four holes, spaced 4" apart and 3" in from each edge of the 10" reference. Drill 5/16" holes for the 1/4" bolts so alignment stays forgiving for a first build. Mark and drill one outside leg first, then use it as the template for the second so both sides match. Use the same row in both columns for a level bench, or one adjacent row of difference for a gentle tilt — don't skip more than one row, or the bolts won't line up and the bench can become unstable.
🔨 Assembly steps
Sand and round all parts
Sand faces, break every edge, and round the top corners before final assembly.
Attach inside legs to the top
Turn the top upside down. Glue and screw one 10" x 5" inside leg under each end of the top. Keep the legs square and centered across the 10" width.
Add triangle braces
Attach two braces at each inside leg — one on each outside face of the top/leg joint. Use glue plus screws or brad nails.
Capture the bolts in the inside legs
Insert two bolts through each inside leg from the inside toward the outside. Add washers and lock nuts so the bolts act like semi-permanent studs.
Install outside legs
Slide each outside leg onto the exposed bolts at the desired hole row. Add a washer and star knob on the outside. Tighten by hand.
Check stability before use
Set the bench on a flat floor. Check for rocking, loose knobs, sharp edges, splinters, or cracks before every session.
✅ Final inspection checklist
- All edges, holes, and corners are sanded smooth with no splinters.
- All four knobs are tight in the chosen hole row.
- Any tilt uses only one adjacent row of difference — never more.
- Bench sits flat with no rocking or wobble.
- Finish has cured fully before use.
- Adult supervision and a clinician's fit/angle check are in place.
Build it yourself
Use the plan on this page or print the PDF for the shop. Confirm measurements before cutting and test fit before finishing.
Ask for help
If you do not have the tools or comfort level, ask a local maker, woodworker, or volunteer to help build from the PDF.
Share improvements
Send photos, notes, and safety observations back to Built For Them so future families get a better plan.

Every Built For Them plan is reviewed and shared by the same small team behind this badge.